If you have ever seen Lisianthus, you’ll know why they are such a coveted flower. Their rose-like blooms put on a spectacular show and make a stunning primary or secondary cut flower. They also have a reputation for being a flower that is difficult to grow–especially from seed. In this blog post, we’ll go over 3 simple steps to start your own Lisianthus from seed.

Step 1: soil preparation in starter trays
It might seem elementary, but getting your soil conditions just right is the key to giving your seeds the best chance of germination and healthy growth. It is recommended to use seed starting mix such as Jiffy Natural & Organic Seed Starter Mix [1] rather than a generic potting soil. Start by pouring seed starter mix into a spare bucket or container and add water to pre-moisten the soil. The key here is to get the soil moderately moist but not wet enough that it starts to drip when you pick up a handful.
Next, do your best to fill the cells of your starter tray uniformly without compressing individual cells (do not press your finger in individual cells!). Gently spreading the soil with your palm is a good way to start. To appropriately tamp the soil, take the entire filled tray and tap 3x on a hard surface. Then backfill the cells that had significant settling.
Step 2: surface sowing
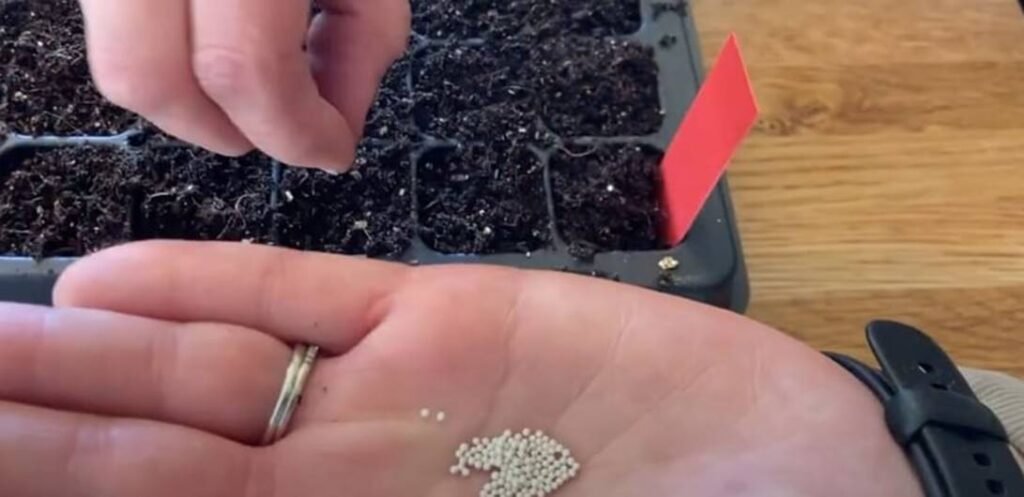
Once your trays cells are prepped, it’s time to plant! Lisianthus seeds are usually sold pelleted, meaning that they are encapsulated in a thin layer of inert material to improve handling and promote better uniformity in germination. Even in pelleted form, these seeds are tiny, so get your dexterity warmed up! Lisianthus are surface sown because they require light to germinate. To plant, place one or more seeds on the soil surface as close to the center as possible. If you are finding it difficult to place the seeds by hand, some guru’s recommend using the wet tip of a took pick. Finally, apply a thin layer of Vermiculite, which helps to improve moisture retention and prevent algae growth.
Step 3: Setup for photosynthesis
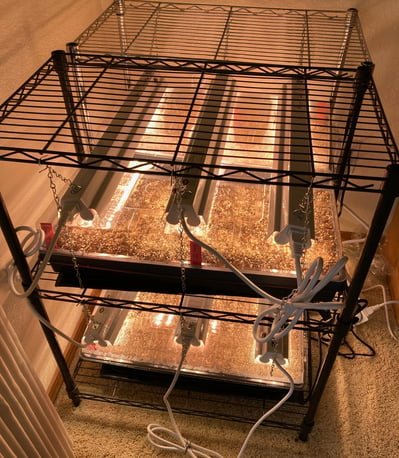
Your surface-sown Lisianthus seeds are now ready for a little light! We have a very simple setup that uses metal shelves, heat pads, grow lights, and a mechanical timer. Heat pads are extremely helpful to keep the seeds environment at a stable, germination-friendly temperature. Grow lights should be placed about 2 inches above the tray for germination. Since we live in a very dry climate (New Mexico), we also use clear domes to promote moisture retention. Given the particular height of our domes, this usually means the grow lights should be placed just above the domes. As the seedlings begin to grow, you’ll need to move up the lights so that they roughly stay 2 inches above the top of the plants.
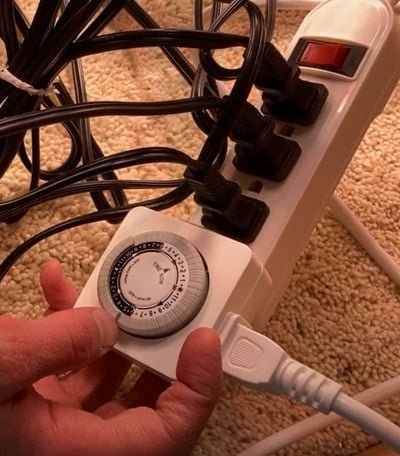
Most grow lights are amenable to daisy chaining, so supplying power through a mechanical timer switch is a great way to avoid having to remember to turn on and off the lights (huge plus for absent-minded professor types like me). Shoot for keeping lights on for about 12-16 hours to simulate a long summer’s day.
A note about watering
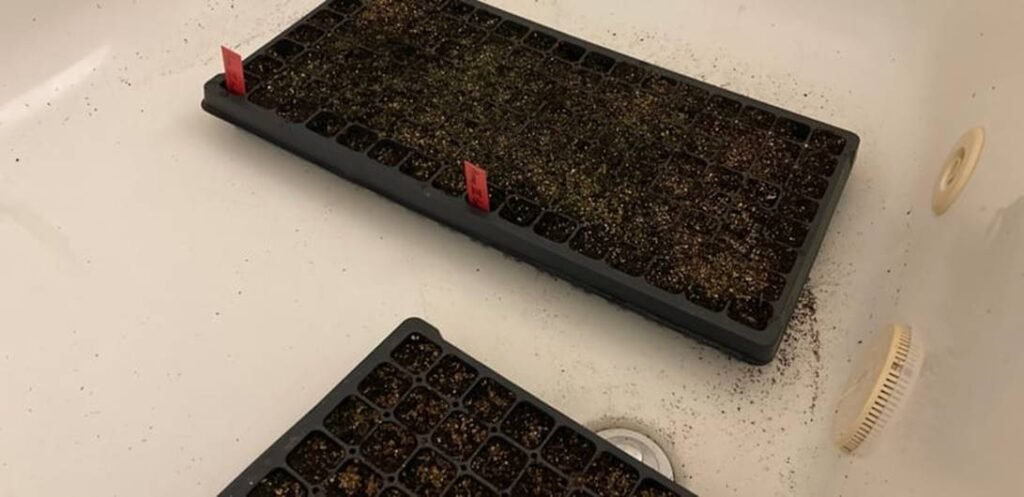
You’ll want to closely monitor the moisture of the soil to know when to water. Again, the goal here is to make the soil moist, not wet. Unlike what we typically do with mature plants, these seeds/seedlings need to be watered from the bottom up. Trays will usually come with a watering tray/liner. Fill the tray with water such that the water is about half-way up the cell and then let the trays soak up the water from the bottom until the surface is moist. With multiple trays, sometimes the best way to do this is using a bath tub instead of the watering trays!